EN
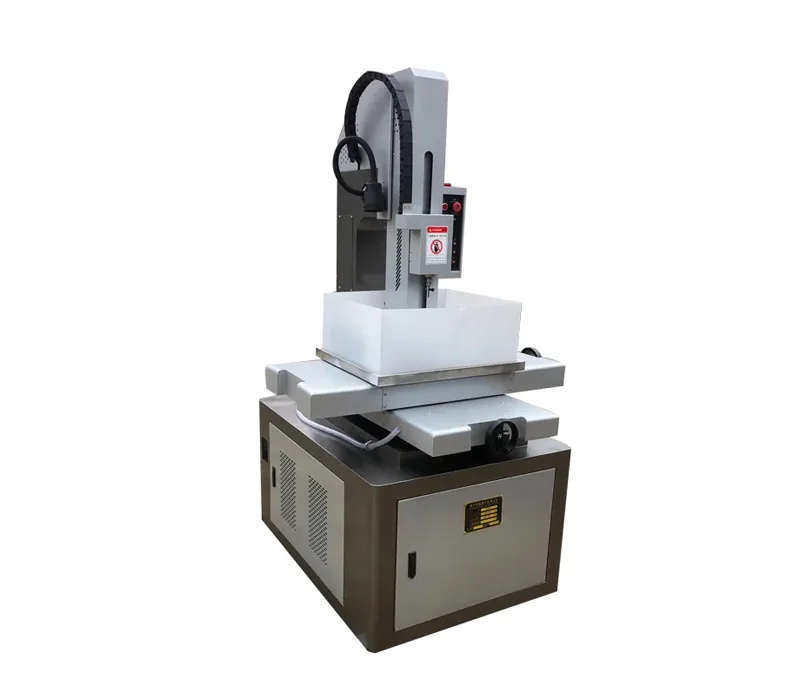
Electrode Integrity and Alignment Issues in EDM Drilling Machine
Electrode integrity on an EDM drilling machine directly influences hole accuracy, cycle time, and consumable cost. Most electrode faults fall into three categories: wear, breakage, and detachment.
Diagnosing and resolving electrode wear, breakage, and detachment
Electrode wear is normal—but uneven tip erosion signals incorrect polarity, excessive peak current, long pulse on-time, or contaminated dielectric. Reliability studies from 2023 distinguish uniform tip erosion (expected) from heat-affected wear, which shows localized necking and micro-cracking. Inspect the tube tip for mushrooming, necking, or pitting after each job. Breakage usually results from high servo feed, a clogged guide, or insufficient flushing pressure. Detachment occurs when the collet slips, clamping torque is low, or the electrode shank is out of round.
To resolve these faults, reduce peak current and shorten pulse on-time while maintaining adequate flushing pressure. Verify that the electrode material matches workpiece hardness and hole depth: use brass tubes for general applications and copper-tungsten for deep or angled holes. Replace worn collets and guides at scheduled intervals, and clear internal tube blockages with filtered compressed air before mounting.
| Fault | Common cause | Corrective action |
|---|---|---|
| Excessive tip wear | High peak current, long pulse | Reduce peak current, shorten pulse on-time |
| Breakage | High servo feed, clogged tube | Lower feed rate, clear tube, increase flushing |
| Detachment | Worn collet, low torque | Replace collet, torque electrode to specification |
After adjustment, run a short test hole and record the wear ratio. If wear remains excessive, inspect servo response and dielectric cleanliness. Consistent documentation of electrode failures reveals recurring root causes and prevents premature replacement.
Correcting electrode deflection and straightness loss to restore hole accuracy
Deflection and straightness loss create tapered, wandering, or off-center holes. Primary causes include excessive electrode stickout, worn guide bushings, spindle runout, uneven flushing force, and workpiece misalignment. Minimize unsupported electrode length and position the guide as close to the workpiece surface as practical.
Measure spindle runout with a dial indicator; replace guide bushings when clearance exceeds manufacturer limits. Use a starter plate on rough or angled surfaces to prevent entry wander. Increase electrode rotation speed within machine limits to distribute wear and reduce side loading. Check flushing pressure balance—asymmetric high-pressure flow can push the tube sideways during deep drilling. Calibrate machine squareness between spindle, guide, and worktable.
For deep holes, reduce feed rate as depth increases and retract the electrode periodically to clear debris. Verify hole straightness with a pin gauge or CMM. If deviation falls outside tolerance, recheck guide alignment and electrode concentricity before adjusting servo parameters. A leading practice is to drill a known straight test hole in a reference block at the start of each shift. This baseline quickly separates mechanical alignment problems from electrical or dielectric issues. Document straightness results by hole depth and electrode size to identify wear patterns.
Dielectric Fluid System Failures Affecting EDM Drilling Machine Performance
Troubleshooting low flushing pressure, air entrainment, and filtration inefficiency
Dielectric fluid insulates the spark gap, flushes eroded particles, and cools the spark zone. When flushing pressure drops, debris accumulates and lowers fluid insulation—causing erratic sparking, pitting, DC arcing, and accelerated electrode wear. Start with the filter differential pressure: a clogged filter is the most frequent cause. Then inspect the pump, suction lines, and nozzle for blockages or wear. Air entrainment often appears as milky fluid or pressure fluctuation at the nozzle, destabilizing the spark gap. Tighten suction-side fittings, maintain proper fluid level, and purge trapped air to restore stable flushing.
Filtration inefficiency creates a cascade of problems. Metal fines, carbon deposits, and oil residue escaping the filter disrupt small-diameter drilling. In micro-hole work, even sub-micron particles alter spark gap conditions and promote recast layer buildup on the hole wall.
| Symptom | Likely cause | Corrective action |
|---|---|---|
| Low flushing pressure | Clogged filter, worn pump, blocked line | Replace filter element, inspect pump and nozzle |
| Milky fluid or pressure fluctuation | Air entrainment | Tighten suction fittings, purge air |
| Erratic sparks and recast buildup | Poor filtration | Check pressure drop, replace filter, flush system |
Replace filter elements when pressure drop exceeds the manufacturer’s limit—or when resistivity remains below 50 kΩ·cm after filtering. A typical dielectric unit holds about 75 liters; visible cloudiness, dark discoloration, or rising arc frequency without parameter changes signals filtration failure.
Calibrating dielectric conductivity and spark gap to prevent recurring short circuits
Recurring short circuits usually trace back to high dielectric conductivity or an incorrectly set spark gap. Conductivity rises as fluid ages and accumulates conductive debris. If resistivity drops below 50 kΩ·cm and does not recover after filtration, replace the dielectric fluid. Calibrate the spark gap according to electrode diameter, applied voltage, and dielectric strength: too narrow a gap invites short circuits; too wide a gap reduces material removal rate and surface finish consistency. High-dielectric-strength fluids may allow a slightly wider gap—but verify stability by checking surface finish. Adjust servo sensitivity and pulse-off time to allow debris flushing between discharges.
Power Supply, Grounding, and Electrical Stability Faults in EDM Drilling Machine
Identifying voltage instability, grounding faults, and spark inconsistency causes
Voltage instability in an EDM drilling machine often begins with input supply fluctuation or poor contact at power terminals. Loose or oxidized connections create intermittent resistance, causing discharge energy to vary and hole quality to decline. Check cable lugs, plugs, and terminal blocks for heating, discoloration, or pitting. Grounding faults usually stem from broken earth conductors, corroded ground rods, or inadequate separation between power and signal grounds. Measure ground resistance with an earth tester and inspect shielding for nicks or loose braids. Spark inconsistency may result from unstable pulse parameters, degraded capacitors, rectifier faults, or electromagnetic interference from adjacent equipment such as inverters or welding sets. Logging discharge waveforms at the spark gap helps distinguish electrical noise from mechanical electrode feed issues. Intermittent relay chatter or transformer tap switching can produce microsecond interruptions that destabilize the spark. Because small voltage shifts alter gap breakdown, verifying input voltage within ±5% and isolating sensitive control circuits reduces recurring short circuits and surface finish variation. In shops with poor infrastructure, power conditioning and dedicated EDM supply lines further stabilize discharge energy.
Coolant, Vacuum, and Auxiliary System Malfunctions in EDM Drilling Machine
Coolant faults in an EDM drilling machine often present as insufficient flow, contamination, or line blockage. Regular checks of coolant level, clarity, and pH/conductivity help prevent electrode overheating and poor hole finish. If the coolant pump runs but pressure is low, inspect suction strainers, filters, and supply lines for debris or collapsed hoses. A clogged filter or blocked nozzle can reduce flushing at the machining gap, causing thermal damage and short circuits. Replace coolant on a schedule based on operating hours and contamination load. Contaminated coolant accelerates pump wear and leaves conductive residue that degrades spark stability.
Vacuum system malfunctions may appear as water leaking from the retract button or ground pin adjusting hole—or as continuous vacuum pump operation after trigger release, or a buzzing sound without automatic stop. These symptoms typically indicate internal water ingress or seal failure. Isolate the vacuum circuit by checking for cracked hoses, loose fittings, and worn seals. Verify that the vacuum pump cycles off within a few seconds after trigger release. If it does not, stop the machine and inspect for moisture in the control cavity. A vacuum leak can pull dielectric fluid into areas that should remain dry, leading to electrical instability and corrosion.
Auxiliary system checks include the chiller or heat exchanger, air supply for pneumatic functions, and any fine-filtration loop. Low chiller capacity or restricted airflow can raise dielectric temperature, lowering viscosity and flushing effectiveness. Confirm that air pressure regulators are set within the specified range and that moisture traps are drained. For machines with a separate high-pressure pump, monitor pressure gauge readings during drilling. A gradual drop indicates pump wear or internal leakage; a sudden drop may point to a burst hose or open bypass. Document baseline readings for coolant pressure, vacuum cycle time, and auxiliary pressure so deviations can be detected early.
Systematic Diagnostic Workflow for Rapid EDM Drilling Machine Fault Isolation
Applying half-splitting and symptom-based prioritization to accelerate root-cause analysis
When an EDM drilling machine fault appears, rank symptoms by impact and frequency first. Use half-splitting to divide the suspected system—electrode, dielectric, power, or auxiliary—into two logical halves, then test the more probable half first. Adjust only one variable at a time to isolate cause and effect. Document each change, observed result, and short-circuit or spark counter reading. This symptom-based prioritization reduces mean time to repair and prevents masking interactions. Once a solution is verified, update setup instructions and maintenance schedules to make the corrective action standard.
FAQ Section
What causes electrode wear on an EDM drilling machine?
Electrode wear is caused by factors such as incorrect polarity, excessive peak current, long pulse on-time, or contaminated dielectric. Uniform erosion is normal, but heat-affected wear may indicate localized necking and micro-cracking issues.
How can I troubleshoot dielectric fluid system failures?
Start by checking filter differential pressure, pump, suction lines, and nozzle for blockages. Air entrainment and filtration inefficiency may also cause system failures, so tighten suction fittings and replace clogged filters to restore functionality.
What leads to voltage instability in EDM drilling machines?
Voltage instability often results from supply fluctuation, loose or oxidized connections, grounding faults, or degraded electrical components like capacitors and rectifiers.
How should I address coolant faults in an EDM machine?
Ensure proper flow and pH/conductivity of the coolant, replace clogged filters, and check for debris-blocked lines. Replace coolant on a scheduled basis to prevent accumulation of conductive residues.
What is the half-splitting diagnostic workflow for EDM machines?
Half-splitting involves dividing the suspected system (electrode, dielectric, power, or auxiliary systems) into two halves and testing the likely cause first while adjusting one variable at a time to isolate the fault.
Table of Contents
- Electrode Integrity and Alignment Issues in EDM Drilling Machine
- Dielectric Fluid System Failures Affecting EDM Drilling Machine Performance
- Power Supply, Grounding, and Electrical Stability Faults in EDM Drilling Machine
- Coolant, Vacuum, and Auxiliary System Malfunctions in EDM Drilling Machine
- Systematic Diagnostic Workflow for Rapid EDM Drilling Machine Fault Isolation
- FAQ Section